How to implement facebook pixel on your website step by step Guide

Introduction:

If we talk about Facebook Pixel, it is a successful instrument for tracking the interests of users and collecting important information from Facebook Pixel marketing strategy development. With the help of it, you can track changes. You can build specific groups, and you can learn how visitors can connect with our website with the Facebook pixel in practice. With the help of this, you will be able to track activities on the Facebook pixel.


Set up and use of the Facebook pixel:

Facebook Pixcel: A question came into your mind: what is it? So there is a bit of code that you can add to your website for the purpose of gathering information. It will be helpful for the audience that you want to target; you can optimise ads; you can also track sales or revenue from Facebook pixels; and with the help of that data, you can target your website visitors.

A comprehensive guide for Facebook pixels:

Step 1: In step 1, you have to make a Facebook pixel. You have to create a business account; it is required to create an account if you don’t have one. With its help, you can access Facebook Business Manager when you go on this page and your login information. If you want to access Event Manager, you have to choose Event Manager. make your pixel , and canconnect with the data sources event manager with the help of it and you can after that you can select wesite and connect with that you can aslo give name to pixel and continue.
Step 2: In step two, you can connect your website with the Google Pixel Code; for that, you have to collect or upload the pixel code to  your website when you create a Pixel. You can copy code that has been sent by Facebook and install that code manually, and you have to make code copy that has been given and copy paste code onto your website. The pixel is a must you have to add to your website in the section of header. These various processes are completed with HTML web pages.
Step 3: In step 3, you have to verify your pixel installation and check it. You have to make sure that you have added it and that it is functioning properly on your website when you add it. You have to install facebook pixel helper you can lacuch it from crome browser you have to check out your website it is access your website by google crome. You have to also examine the pixel to see if it will locate and teach pixel tracking, visit the page, and be active.
Step 4: In step 4, you have to configure pixel events. It gives us the ability to monitor a particular activity on the website. You can access manager events by returning to Facebook business manager events. You can also customise events to track their actions.
Step 5: In step 5, analyse and improve its track to ensure your events are working properly. That event pixel is tracking and visiting the event manager. And obtimise ads; it also arranges events; it considers the main action that one visitor wants. It employs custom conversions like tracking and reporting that it suggests based on event standards. and improve the audience.

Conclusion:

In conclusion, I want it to be a key initial phase or step in simplifying your Facebook advertising to better understand it, understand user behaviour, and install a Facebook Pixel into your website. You can simply collect data or monitor its conversion and increase your monitoring strategies. In the following steps, you can easily track your successful tracking, which is very helpful for marketing and business strategies.


How to use Squarespace as a Beginner

Introduction:

You are wondering what Squarespace is, so today I am going to tell you about the well-known website building platform Squarespace. With its help, you can easily create a website without knowing any coding language. It provides templates and tools to make work easy. Either if you are creating an online store, launching a blog website, or showcasing your work, With the help of these guides, you can quickly launch your website, which will guide you through the basic steps of Squarespace.


So let’s start:

Step 1: In step 1, you have to register.
Check out Squarespace: check out Squarespace.com.
Establish an Account: In the main menu, you have to create a password along with an email address.
Select a template: In Squarespace, you have to select temples. The various types of temples provided by Squarespace can be pictured according to your choice or best suits you.
Don’t worry about choosing the perfect template; you can change it as you want.
Step 2: In step 2, you can create your website.
Launch your free trial: Squarespace provides us with a with a free fourteen-day trial. With the free trial, you can easily check out what services it provides.

Give your website name: You can provide website names as you want, such as if you are creating businesses or blogs.
Customise your template: you can choose a template, and after choosing a template, an editor will be displayed, and with the help of the editor, you can easily create your personal website.

How do I use the editor in Squarespace?

Step 3: Making page edits and getting to pages: you have to provide a menu you can easily locate with the help of which you can select pages and list all the pages on your site.
Add new page : with the help of add new page, you can click on the add button, and it will provide you with various types of pages, such as galleries, blogs, and commerce pages.
Editing a page: you can edit the page, and as listed, you can add photos, texts, and other materials, as well as change the layout.

Step four: Content add for text: if you want to edit a text block, you have to click on it. Text font size, colour, and alignment are all editable.
Images: If you want to change an image or upload a picture from your laptop, you can add it.
You can also change the size, edit, or position.
Parts: It gives us the option to put down other additional elements on your pages. Such as galleries and banner contact forms. You can create part clixk on add button select what kind of material you want to add.

Step five : In step five it gives us website modification for what purpose you want you can given look as you want for example colour, fonts and spacing .
Title and logo: You can also add a logo or change the title.
Squarespace helps create logo and title from design menu .
Header and Footer: in the header and footer, you can click on them and edit them on your website, like links, navigation, icons, and others. In addition, it provides better tools like blogs to improve the functioning of e-commerce websites.

Step six: In step six, you can write blogs and create a page for them. You have to go into the pages and create a new page for them. There are many different types of layouts available. You can also create a new post.
Go to the add button and click on add new post. After you can publish, when you complete your content, click on save and publish. It will be enabled to show on your website.
Step 7: With the help of it, you can establish an online store.
You have to click on the add button and choose, and from the pages section, you can add products. With the help of adding, you can select the pricing of your products as it depends on product to product. You can also set up payment options, like selecting commerce from the menu on the left. You can link your website to different payment options, such as PayPal or others. You can also set up shipping costs.
Step 8: You can use different materials like social networks, maps, and forms with the help of Squarespace.
Step 9: It is also for mobile optimisation; it is good for testing your website over devices.
you have to click on mobie symbol in to a editor page .
Step 10: With the help of it, click on the meta title, analytics, and SEO; this will be better for the search system. With the help of it, you can also monitor the efficiency of your website.

Step 11: In step eleven you can get website with the help of it and you can easily take domains and with the help of plans and connect to the domain and with the help of it you can easily publish and maintain to website simplicity and update it regularly and upload high quality images .

Conclusion :

In using Squarespace, you can make an amazing and useful website by following up on those steps I have told you above. This includes everyone, like beginners, making a website as you want and changing it accordingly. It is very important, useful, and easy to use, and there is no need for coding.


Beginner’s Guide to using a coffee Machine

Introduction:

Now I am going to tell you about the coffee machine. It is one of the most popular drinks globally due to its rich flavour and energetic qualities. Basically, this guide is for those who have recently bought their coffee maker and are new to making coffee at home. We will operate the fundamentals of a coffee maker with the help of this guide. I hope you will be able to make a wonderful cup of coffee, so let’s start.

Knowing Your Coffee Maker Machine Before we start, it is important to understand the types of coffee machines. We will concentrate on the most prevalent ones. Because there are a variety of coffee machines,.

Drip Maker coffee machine: this machine is the most prevalent type of coffee machine in homes. First, water is heated and then poured into a filter holding ground coffee to brew coffee.

Single-Serve Coffee Maker: It uses Keuring and similar machines to brew one cup of coffee at a time using coffee pods.

Espresso maker: For the Expresso maker, this device crushes coffee finely and uses hot water to create espresso, a powerful, focused coffee.

Now, to open and configure your coffee maker, follow these steps:

Go through the manual. When you purchase a computer, a computer, you get a manual handbook that contains essential details for operating and maintaining the computer..

Make the machine clean: For curing your machine, you have to remove dust or unwanted manufacturing waste at the time of cleaning a procedure using only water.

Choose a Fitting Location: You have to choose a place where there should be a heat-resistant surface. Using a drop coffee maker to make coffee is easy to use and is best for newcomers.

How to utilise one is as follows:

1 step: First, you have to assemble your materials: fresh coffee beans or ground coffee beans. Your coffee filter device needs pure water.

2nd Step: If you want to make coffee, check the quantity of coffee. For every 6 cups of coffee, you can use two tablespoons of coffee. Adjust the quantity to your personal taste.

Grind the Coffee: You can also grind beans to medium softness if they are entire; it typically comes with the freshest and best taste.

Step three: we have to include the water pouring into the holding tank. You can fill the tank of the machine with cold and used fresh water. You can also use the measurements provided by the machinery to guide.

Examine the coffee maker; you have to verify that our pot is positioned in the drip basket.

Step 4: In this step, you have to put the filter in the place. You have to make sure the paper filter is used by the machine, so you have to put one in the basket. Some devices give reusable filters.

Include coffee grounds: you have to put measured coffee grounds into the filter when the boiling point starts.

Await Finalisation: In the finalisation process, it will typically take approximately five to ten minutes.

Step 5: You can show and taste the coffee you can put into your preferred mug as soon as it is read. You can add milk, sugar, and your freshly made coffee.

Making coffee in a single serving Machine: It is a quick and easy-to-use single-serve machine. It is easy to use. Now we are going to follow these steps on how to use it:

Step 1: You have to assemble your materials.

Step 2: You have ready your equipment, like water, etc.

Step 3: When you make coffee, put the pod into place.

Step 4: In the In the last step, you can serve and enjoy your hot, freshly brewed coffee.

Using an Expresso Machine to Make Expresso:

If compared to others, it is a little bit complicated, but it can create the best coffee now that we are following those steps.

Step 1: First, you have to assemble your materials. Like roasted expresso beans, etc.

Step 2: You have to make sure how much coffee you want to make. You can make eighteen to twenty grammes of coffee.

Step 3: In the third step, you have to make your equipment ready.

Step 4: In step 4, you can serve and enjoy your hot and fresh coffee.

Conclusion:

In conclusion, I will say I have told you the best machines from many types of coffee maker machines. With the help of that, you can make coffee at home and enjoy it. I have a guide on the basic fundamentals of coffee making that will surely help you a lot because new users don’t know how to make coffee, so this guide will help you.

Beginner’s guide to 3D printing

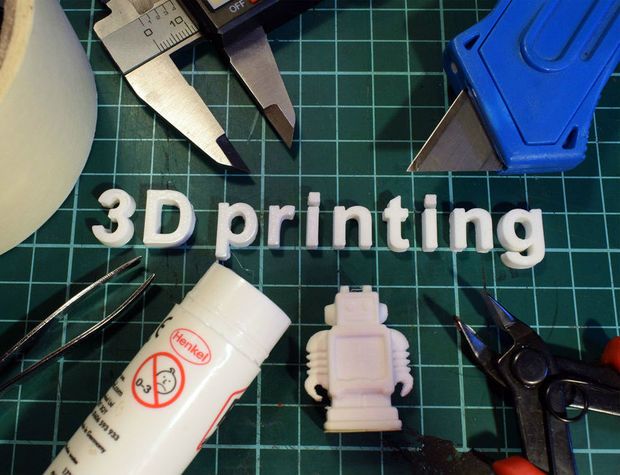
Now we are going to guide you about the 3D printing in article I will guide you easy to understand the introduction and 3D printing concepts from this guide can help for those who are interested in 3D printing, whether it is a hobbyist, or tech interested , student  in understanding the idea , manage and starting point of 3D Painting.

Introduction:

3D painting helps you create three-dimensional objects using a computer file, a technique called additive manufacturing design. 3D painting subtractive production, which is a process for generating shapes by eliminating material, produces objects layer by layer from bottom up.

How is 3D printing operational?

Create your model:First, you have to create a 3D model. First, 3D modelling programmes such as Blender, SketchUp, or Thikercard can be used to design 3D models. In addition, templets are also available at the location of Thingiverse.
Get the file ready:After that, when you collect your 3D model, you have to convert it into a format that the 3D painter can read. If we talk about stereolithography, it is widely used after converting the model into small layers using slicing software, for example, Cura or Prusaslicer, to generate a G-code file that the painter can read.
Configure the painter:We have to fill the filament, which we need for printing materials like PLA (polylactic acid) and ABS (acrylonitrile butadiene styrene), which are mostly used to make it separate. Once your model is printed, make sure your print is spotless and level.
Get printing now: You have to use wi-fi or USB to transfer the G-code file or SD card for printing. Once you have started printing, make sure you are printing layer by layer with your printer.
Following processing: When you print your object after it has been finished off your printer surface, you also have many qualities of a 3D printer.
Fused data message:If we talk about fused data printers, the most popular type of 3D printer is one that constructs things layer by layer.
Poros: In poros, there is a large section of material that is easy to use and affordable.
Cons: If we talk about his cons, the main cons are that it takes a long time to detail print, and the surface may print clear layers and lines.
Stereolithography:It transforms liquid resin into solid plastic with the use of a of a laser. The laser follows the layers layer by layer, built in shape.
Advantages:It has excellent accuracy and a soft polished surface.
Cons: Polymers can be hard to handle carefully; they are also more expensive.
Selective laser sintering also fuses powered materials, typically nylon, using laser to create solid objects.
Advantages: It has a strong and durable print that doesn’t require a support structure.
Cons: Princely and mainly used in industrial settings.
3D painting is produced with suitable material, for example, cornflour. It works very easily and breaks down easily.
Ideal for: beginners, enjoyment, and activities.
Selecting a 3D printer:If we talk about printers, FDM and Prusa Mini are excellent options at the beginner level. They offer us support and a network that is affordable and simple to use.

Conclusion:

In conclusion, I want to say it is a fascinating and useful technology that is easy to use every day as a 3D printing tool. With the help of it, you can easily learn amazing technology and speed it up if you understand the fundamentals of it and begin with projects. In 3D painting, it is possible to use it to create various unique designs with the help of 3D painting, so come forward and understand the things, enjoy and learn them, and make your creativity shine. It is best for every designer.

How to use click up to manage your workflow

Effective task management and planning are crucial for professional and personal success in the hectic world of today. With its help, you can do it with the help of ClickUp, an effective tool. ClickUp provides an extensive set of features for managing your task, whether you are working with a team or an individual. Now we will go over the over the basic principles of using ClickUp to manage your workflow.

Introduction: –

In the click-up, it works on the cloud for performance and project management tools. It gives a variety of features that can help in task management in project management and team management. It gives a number of features on one platform, such as setting goals, sharing documents, managing tasks, and also monitoring time.

How do I use Click Up?

  1. Register and setup:   First, you have to register and create your workspace. To start with, you need to create a click-up account-free version. It also gives you a lot of features that can be continued. From where you start, you can also set up your workspace as you register. This is the main portal where you can handle all of your tasks and projects.
  2. Arrange your Desk: You have to also arrange your workspace. After building your workspace, you have to also set up basic guidelines.
  • Spaces: spaces indicate a high level of management, making them separate entities if you have different categories like personal projects, marketing, and development.
  • Folders: When you manage your files, you can make folders for each section, for example: In marketing, you also have documents, social media, email, and information creation.
  • Lists: you can also create lists for individual assignments that can be put into categories like folders and support to clarify work according to your project or goals. Creating and scheduling tasks.


It is focused on task creation and responsibility for them:


  1. Establish a task: click the +New Task button and select the job you want. Details like the task name, the description the assignee, and the deadlines.
  2. Task specifiers: You can also specify task you can also create and edit.
  • Description: You can provide a description what you want to create.
  • Assignees: You can also assign assignments to your friends or to yourself.
  • Due Date: You can also set up a due date to make sure you want to finish your assignment.
  • Priority: You can also highlight the importance of the task, for example, urgent or high-normal.
  • Subtasks: you can also divide difficult task with more manageable in smaller task.
  • Attachments: You can also upload any relevant files and photos for the job.
  1. Opinions click-up offers opinions to help you see your task:

  • List view: in a normal view, you can create a list that displays the task shown as a board view. A kanbanstyle allows you to drag and drop them throughout the columns (progress, done, and to do).
  • Calendar view: A click-up task is also shown on the calendar, which makes it simple to see due dates and planned tasks.
  • Gant Chart: It also shows connections in task timelines that display the start date and end date.

Features of teamwork Click up to make teamwork simple:


  1. Remarks and highlights: you can tag team members and leave comments; it is very helpful.
  2. Documents and Attachments: You can also use Google Docs to distribute and create documents in your workspace. With its help, you can attach files. This maintains usability and controls information.
  3. Monitoring Time: In the click-up it monitors your time, tracking how much time you spend on various tasks. This keeps your eye on your task and ensures it is completed on time.

Additional Features:

After the advancement of fundamentals, you can also explore advanced features and improve your workflow.

  1. Particular fields: You can also create a particular field that is not covered by a by a normal field by using a custom field.
  2. Mechanisms of Automations: It has automation techniques for repetitive jobs and makes it easier to design an automation for notification and the due date of a task.
  3. Objectives: With the help of Click Up, you can monitor goals and progress tracking and give motivation to the maintenance.

Conclusion:

In conclusion, by clicking up, you can improve your work flow with the basics and advance its management and performance. Very flexible and strong tools make it successful. With the help of it, you can manage individual and team projects as well. It is very important for managing tasks and making your work simple it is better.

7 Project Management Tools you need to check Out.

Introduction: –

In today’s world, Project management in the rapidly changing world of today relies on smart project management. You think if you have the right tools, it will be very beneficial for you. It will be very helpful for you if you are managing a large company or a small company. Here are the lists below of the seven project management tools that will be very helpful for you. Project management tools can guide you in managing, finishing, and monitoring your project tasks. Each of these tools has its own particular ability to manage tasks.

1.Trello: In Trello, there is a graphic interface for managing the tasks of your project. It is very easy to use; it helps you graphically manage your tasks with the help of boards, lists, and cards. It is very helpful for both private and commercial purposes. It also has some important cards, boards, and lists. With the help of lists, you can manage stages of lists. cards are also for particular tasks, and boards are for different tasks with the help of Trello’s  simple graphical framework.

Working together, you can compose feedback, assign projects, and set deadlines. You can also invite team members for discussion. It is simple to use and will inform in a group as a result. It gives us a wide range of programmes, like Google Drive, Dropbox, and ack. Trello is our favourite for teams and project managers because it gives us a flexible and simple user interface.

2.Asana Goal: It is managing the team project and tracking tasks. Asana Goal is an effective way to monitor the group task and track it with the starting and ending of the project. It also has the main features of adding a task list, dividing it, and tracking their progress. It also gives us calendars and timelines. With the help of calendars and timelines, you can easily make plans and access the status of your project work. It also has team collaboration; you can assign tasks on the same page, establish their duties, and communicate with them.

3.Monday.com: Monday.com is an operating system for scheduling tasks and automating operations. It is a flexible tool for managing daily tasks and activities, projects, and progress. It has a customise panel, and with the help of Monday.com, you can create a panel that specifies your particular requirements if you are a role player in customer services, project management, or tracking sales. It also automates routine tasks, adding notifications and progress, and saving time.

It can track progress on the dashboard with the help of flexibility and automation options. Monday.com can be used with a variety of teams and projects.

4.Basecamp’s Goals: In basecamps, it simplifies interactions and work together for the project. With the help of it, teamwork is simple, it reduces the need for email project discussion in one location, it also gives to-do lists, makes lists, assigns tasks, and monitors them. You can easily assess files in a in a structured manner.

5.Jira’s: It is used for issue tracking and project management. Developer fields Jira is a powerful tool made especially for tracking issues. Kanban and scrum visuals Scrum is used for sprit preparation, and Kamban is used for ongoing workflow visualisation at a time of agile processing.

It also manages upcoming projects in a simple way. It is a vital tool for teams with the help of agile technique.

6.Microsoft Project: It gives us complete planning and management of projects; it is strong for project organising and monitoring all sizes of projects; it gives some important benefits like Gant charts for easy visualisation and easy creation of project timetables. With the help of it, you can also manage resources.

7.ClickUp: This tool gives us all-in-one platform for managing projects. It gives us tracking tasks, goal documents, and more. It also gives us task management abilities. You can organise work and set work for each of them and monitor it. You can also use visuals for calendars in your work space. You can also create, share, and work together on documents and wiki sites.

Conclusion:

I want to say that with the help of these tools, you can increase your team productivity and efficiency. With the help of these seven tools, every tool has special characteristics and advantages that depend on the needs of the task and project. I hope you will explore these tools, take advantage of their benefits, and find which one is suitable for you.

15 Best writing Tools for Beginners

Introduction: –

Today I am going to tell you about the best writing tools. With the help of these tools, you can write on your devices. When you use the correct tools, it makes a big difference in your writing skills, for example, a novel, a blog article, and you can also organize your thoughts. So, let’s start discussing the 15 best writing tools that will help you write more effectively and efficiently as a beginner. Best Writing Tools: Top 15 Every Writer Needs

1.Google Docs: Google Docs is the best because it gives us free usability and, from any internet connection collaborating together, it also has automated version saving.

2.Microsoft Word: Microsoft gives us a wide variety of editing features; that’s why it is great. It also gives us many formatting choices that are popular and functional, and it gives us an extensive number of other programmes.

3.Scrivener: You are thinking about this tool and why it is great. It is great because it is designed for lengthy writing like assignments, blogs, and novels. It gives us corporate tools such as outlines and corkboards, choices for export, and choices for formatting.

4.Structurally: It is great because it gives us real-time accuracy in spelling, grammar, and styling suggestions for improving text clarity and simplicity. It also has a browser add-on for evaluating your writing skills on the internet.

5.Hemingway: It is the best tool because it gives us better attention to typical errors and challenging sentences; it also gives us a readability rating; and it also points out the short and clear.

6.Evernote: It is an excellent tool for writing and note-taking, and the structure tool coordinates with every device. It is also good for describing thoughts and studying.

7.Ulysses: It is also a great tool everyone has to use because it has a simple user interface, spreads work into sheets, has easy management, and can also be connected to iCloud to provide access to Apple gadgets.

8.Reflection Writer: It is the best app because it is free of distraction, has adjustable graphics, and also gives us the ability to focus on everyday goals and progress.

9.Pro Writing Aid: It gives us in-depth writing, grammar, and formatting evaluation and full analysis on various aspects of your writing, and it also interacts with Word and Google Docs.

10.Trello: It is the best tool because it provides board-based project management visual solutions. It also has a management tool for managing writing tasks that encourages collaboration with projects.

11.An Idea: It is the best tool because it gives us all-in-one workspace for notes, databases, tasks, and calendars. This is the reason for its greatness; it also has highly flexible writing.

12.Bear: It is the reason why I have added in the best tools because its clean-looking markup editor utilises arranging labels for organizing notes.

13.Reedys Book Editor: It is the best tool because, with this tool, you can easily format books and write them for free. This online tool also has easy and simple drag-and-drop chapters. It is also print-ready in pdf or EPUB formats.

14.Liberty: It is best because it blocks websites from distracting you and customizes your writing timetable to coordinate with every device.

15.Zen Writer: It is the best tool because it has a full-screen and is distraction-free from the working space. It also gives us a better user interface, like sounds when you write in an adjustable way, which is the reason for bitterness.

Conclusion:

These are the best writing tools that will cover everything, from maintaining and arranging to giving you focus on creating and editing. With the help of these tools, you can increase your writing skills, and you will also enjoy them because they have adjustable sounds that you can also include in your daily writing routine.

7 Apps I can’t live without

Introduction:

In the digital era, our mobile phones are essential instruments and tools in this modern age that allow us to manage tasks, everyday duties, and occupy ourselves and stay connected with them. So, we are going to discuss those essential apps that will surely improve our daily routine, so don’t waste time. Let’s start. I hope you are curious about these apps.

1.WhatsApp: _

You are thinking about this app and why it is important, so I am going to tell you about why this app is so popular. It is messaging software, and with the help of it, you can send documents, photographs, and movies along with texting, and with the help of it, you can also make audio and video calls. With the help of WhatsApp, you can easily communicate with your friends, interact with them and their families, and also communicate with the world around you. This app is very essential for our daily lives. It also has some important features, like free Wi-Fi, video calling, and chat. You can do group chats in this app with several people and interact with them together. It gives us secure communication with end-to-end encryption.

2.Maps by Google:

You are also thinking about Google Maps and why it is important, so I am going to tell you the reason for its importance. It is a recommended app, and it helps to find out new locations and navigation. It also gives us traffic information in the nearby locations and details. It also has key features like turn-by-turn directions. It is also helpful for drivers and public transport. You can also go through reviews systems in your close areas, like if you want to travel or eat something, you can also check reviews offline. Maps only work with navigation. So, it is very helpful for our daily lives, so I suggest everyone use it.

3.Use Spotify: –

So, I am going to tell you about the importance of Spotify and why it is important. It provides us with a with a significant, well-known music service provider; it also provides us with a with a podcast and playlist collection; you can also listen while travelling and gain knowledge without wasting your time for music lovers; you can also search for your favorite songs and new performers; you can also make playlists; you can discover weekly and daily songs; you can also listen offline when you are not connected to the internet; it gives us audio streaming.

4.Google Photos: –

So, you are thinking about why Google Photos are important. Let me tell you the importance of Google Photos. With its help, you can simply share photos, manage them, and make memories for yourself from any device. It also provides us with limitless storage and gives us high-quality images. Now, going to his main features, it also gives us sync and backup automatically. Detailed searched items and locations are also capable of making albums and collages.

5.The to-do list:

So, I am going to tell you about the to-do list. It is very essential for task management because it gives you a busy schedule for what you have to do. It is also very important for your personal and business organizing tasks. Its features are that you can assign tasks with deadlines and goals and also group what you have to do.

6.Silent: –

So, you are thinking why I have taken silence because this is a software that will help you stay calm and mixes meditation and relaxation to improve mental health. This software also provides us breathing techniques, gives better night sleep, and also helps in our daily lives. It gives us calm music and the sounds of nature. It also gives us a variety of meditation classes.

7.Dropbox: –

So, we are going to tell you about the importance of Dropbox as a cloud storage. It gives us a platform storing, sharing, and editing documents for those who are very dependable on paper, so you can use Dropbox and access it from your mobile phone. You can also sync files on several devices. You can also access file while offline.

Conclusions: –

So, I am going to conclude that these seven apps have major features like modern living, file management, entertainment, mental health, helpful for communication, as well as navigation. With their help, you can also improve your productivity, manage your connections, and enjoy your life by using them in your daily routine.

Best automation tools to make your life easier

Introduction:

In today’s world, everyone wants to make their lives easier and manage their time, so here we are for you to make your life easier with the best automation tools. streamlined everyday tasks in a fast way, you can save your time, and you can also concentrate on what really matters. With the use of automation tools and automation technologies, you can handle repetitive tasks. So now here we are for you to come with the best automation tools to make your life simpler.

If This then That (IFTTT): In this tool, it allows connected apps to function together with gadgets and apps, which is the main reason behind the creation of these applets. If this will happen, then that should also happen. If I came on his assists part, if you have saved your Facebook image to which you have attached, it will automatically save your image in your Google Drive, and when you get home, it will automatically switch on the smart lights.

Zapier: So let’s talk about Zapier and what it does. It can automate workflows such as Zaps to connect with your favourite apps. If we work on its functions part, it works similar to IFTTT, which I will suggest for business and professional uses. So come on to its assists part, how it assists it can transfer your Gmail attachments to Dropbox; it can add current Shopify orders to a Google Sheets spreadsheet. It creates Pinterest cards from current Gmail, so in terms of performance, it can support more complex workflows with large sections of connections, making it a more successful tool for both business and personal use.

Microsoft PowerPoint: So come on, Microsoft Presenter, how does it help? It is a project management application that can arrange tasks using lists, boards, or cards. So come on the benefits part, one main benefit is that it automatically separates documents by their due dates. It also makes tasks repetitive. It connects with Google Drive and Slack; it manages tasks very quickly, and monitoring your process makes it easier.

Alexa on Amazon and Google Assistant: with your spoken request, Alexa on Amazon and Google Assistant voice-activated assistants can carry out a out a broad range of tasks. It can manage your alarm and remainders; it can also manage smart home, for example, smart lights and thermosets; it responds and gives about weather updates. With any physical touch, it assists your voice commands and manages daily tasks. It also improves home automation with smart devices.

Microsoft Power Automate: It works according to your workflow across your preferred services.
It benefits because attachments can be automatically saved to OneDrive. If any task or project management tool changes, you will receive notifications for sync data. Apps like Salesforce and SharePoint have an outstanding connection with Microsoft, making them perfect for the office.

Roomba: It is a vacuum cleaner with robotics. It is able to clean floors by its own benefits. It makes sure your floor will automatically schedule cleaning time when you want to clean it. After cleaning the room or floor, it comes back to your charging point. Some versions operate voice assistance or smartphone apps like Alexa or voice assistance.

Conclusion:

If we came to the conclusion part, it defined for us to take care of our routine tasks so that we may focus on our important areas of life. It probably automates tasks like office housekeeping or job organization. It will save time and reduce stress. It can be used in your regular, normal schedule.

Free video Editing App for Android without watermark

Welcome to the age of fascinating visual material and modern communication. I am here only for Android users who want to create fascinating videos, but the problem faces everyone: how can we locate free video editing tools that don’t give watermarks at the time of creation? You don’t have to worry about it. I came here with a section of the best choices for you. Come and be ready to enter a world of endless creativity. You can create films at an excellent standard, so let’s start and follow along with me on the ride of the techniques for creating fascinating videos with the help of any Android device. In which field do you want to create videos with your amazing stories and showcase them with the help of the best creative videos without cost?


The best free apps for Android users without watermarks

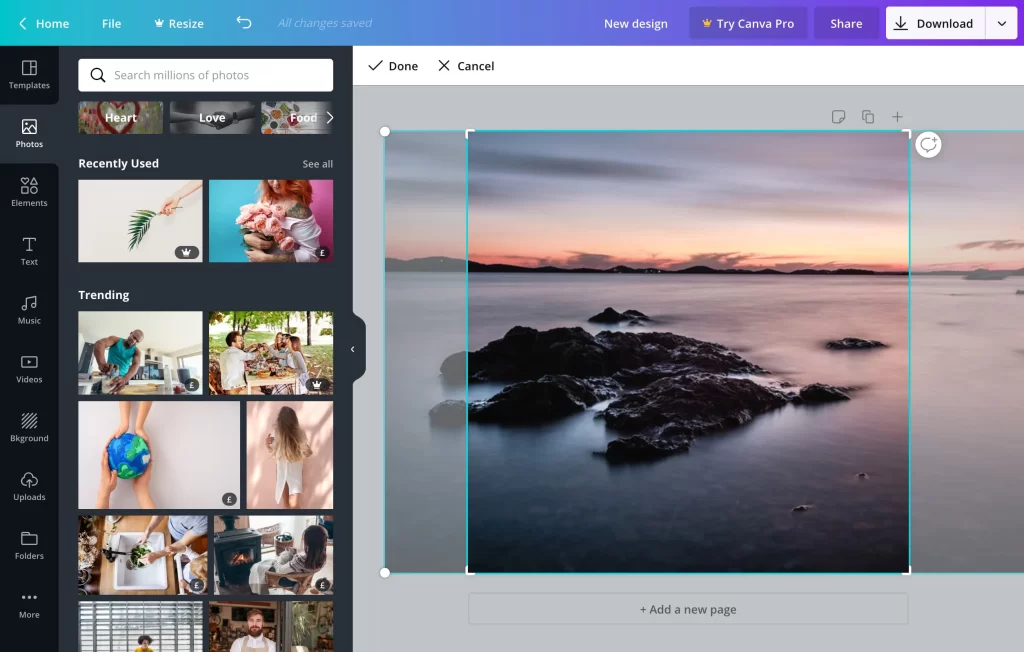
  1. Canva: Now I am going to tell you about the Canva tool. You think Canva is used only for graphic design, but it also has excellent functions for video editing. It is a very simple user interface and also has a huge collection of themes, designs, and visuals for Android users. You can easily make videos and edit them. You can also edit blogs of your personal and advertisement videos, even social media clips. Canva’s gives us very simple and user-friendly tools for editing, without watermarks, and a better experience.
  2. Power Director: Power Director is full of features for video editing software. It provides the best tools for Android users that will be suitable for the job, so let’s tell you about the tools: multi-track modifying, frame visuals, and clour keys. effects for Power Director with the help of it could perfectly create videos without a watermark, and it also gives us an enormous number of titles, changes, or implications.
  3. Video editor for vita: Lets start with the vita video editor tool for Android. Vita gives us effortless video editing. For those who give paid software, it is better than them. Now let me tell you why Vita is an outstanding choice for users. It is very simple to use his design, professional abilities, attractive effects, or plugins. It also give paid software, it is better than them. Now let me tell you why Vita is an outstanding choice for users. It is very simple to use his design, professional abilities, attractive effects, or plugins. It also gives us unique changes, so with the help of you can easily create better videos. With the help of Vita, it is the best professional tool for Android users. It also gives us stickers or text, audio features, actual time, and is free from watermarks.
  4. Photo and video Editor Picsart: Now I am going to tell you about Picsart it is all in one for editing for android users it also gives us both capabilities like photo and video editing it also gives us best filters and animations for better appearance picsart is also use for text, labels, and pictures with them for better look in this app I assure you free from water mark confidently you can share your creativity with the help of those tools so you have to must try


Conclusion:

In conclusion, I want to say that I have told you about better apps for video and photo editing tools for Android users for a better experience, and these tools are easy to use. They are free from watermarks, and you can easily upload them with any watermark, so start using them and get the best experience from these tools.